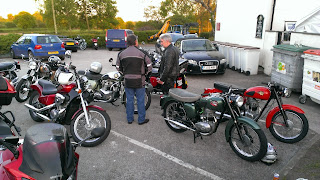
Saturday 31 August 2013

New centre stand + wheel alignment

As usual, click on any hand-drawn and crayon-coloured image to zoom in.

The centre stand on the Mario Mobile was bad. Shockingly bad. I had to put it on planks of wood to get it to stand up. If you tried using it on the road, the bike would wobble unsteadily - a bit like me walking home from darts.


Anyway, I splashed out on a new one and rode over to see Luigi this morning. He said, "Hey, long time no see!" to which I replied, "Hey, look what I've brought over for you to fit to my bike!" He looked so thrilled I was touched (with guilt).

As you can see from the shot on the left, he had to take off part of the exhaust to remove the offside bolt. You can also see me taking a well-earned rest - it's stressful watching him work on my bike while he's muttering under his breath about someone taking liberties.


As you can see from the shot on the right, the camera was more interested in what was on the floor than the stands, but the new one is on the left and the very worn one is on the right. Notice also how the centre hole is oval rather than circular.


The final shot below shows the new centre stand in action and that the rear tyre is off the ground - spiffing.


The second job of the day was to make good on the bodge job I'd made on Luigi's bike when we took a link out of the chain. The back wheel wasn't quite in alignment and you could occasionally hear the chain catching on the guard. Time for the old string trick! Tie it round the front wheel and drag it backwards through the centre stand. Wiggle the back wheel around until:

  1. the string touches the front tyre in two places and also the back tyre in two places;
  2. the chain is at the correct tension - not too tight or loose.

Sunday 25 August 2013

Time for another oil change

As usual, click on any hand-drawn and crayon-coloured image to zoom in.


There's not been much happening over the last few weeks. Surprising really, given that it's Summer but there you go.


I rode over to Mark's this afternoon though to do an oil change - it's been just over 500 miles since the rebuild so we put some new mineral 20w/50 oil in the Mario Mobile and Luigi put some Morris Golden Film in his before we popped out for a 40 miles jaunt in the sunshine.

Friday 26 July 2013

50% of the way to running it in!


As usual, click on any hand-drawn and crayon-coloured image to zoom in.

We took a ride out via Alderley Edge last week while trying to put some more miles on my rebuilt engine.


Ended up outside where Luigi worked for Harlequin after he graduated in 1994.

Sunday 23 June 2013

New bank card

As usual, click on any hand-drawn and crayon-coloured image to zoom in.

Luigi has taken advantage of Barclays' offer to put a photo on his bank card.

Nice.

Sunday 16 June 2013

New fork seals

As usual, click on any hand-drawn and crayon-coloured image to zoom in.

Mario's steed passed its MOT last week but there was an advisory on one of the fork seals.

It's in to have it replaced at Cadishead Motorcyles

Happy Father's Day!

As usual, click on any hand-drawn and crayon-coloured image to zoom in.

Mark's present today!

BSA service sheets

As usual, click on any hand-drawn and crayon-coloured image to zoom in.

I forgot that when I bought my bike that it came with a box of spares and service sheets! Nice.

Friday 7 June 2013

Nice night for a ride

As usual, click on any hand-drawn and crayon-coloured image to zoom in.


Popped along to The Antrobus Arms last night.


Can you spot our bikes?


Sunday 2 June 2013

Halogen bulbs and petrol taps

As usual, click on any hand-drawn and crayon-coloured image to zoom in.


My bike seems to come out in sympathy with Luigi's every time it has a fault!

Mark has replaced his petrol tap plunger and now mine's gone. He reckons you can just unscrew it in order to replace the cork, but mine was well and truly seized and in a fit of temper I managed to destroy it with a pair of pliers. And then jumped up and down on it. Needless to say it's now flat as a pancake.

It's a good job he is such a dutiful son who is there to fix all of my ham-fisted shortcomings - he has loaned me the use of his spare tap although it needs a new cork really. I've ordered some new corks from ebay - figured I ought to do something.

Mark fitted the 12V halogen sidelight bulb today that I procured for him. It's brighter than his 12V dipped bulb!

Friday 31 May 2013

Chrome trims on, new petrol tap soaking

As usual, click on any hand-drawn and crayon-coloured image to zoom in.


Mark (Luigi) has fitted his chrome trims to the tank - bit of a pig getting them bolted down. You'd think it'd just be a case of dropping them on and screwing them in but the holes didn't line up and there's still a gap at the bolts.

His petrol tap has been showing a drop of petrol and feels very loose to slide in and out so he popped in to see Brian at the local shop for a new cork. The cork was £7.20 but to be fair it did come with a free tap connected to it that he didn't ask for. Here it is soaking in some vegetable oil to make it easier to fit and allegedly to make it impervious to petrol trying to leak through.

Thursday 30 May 2013

Petrol tank stripped and relined

As usual, click on any hand-drawn and crayon-coloured image to zoom in.


Mark has had his petrol tank stripped and relined by Tim Miller in Altrincham.


Monday 27 May 2013

Difficult to start?

As usual, click on any hand-drawn and crayon-coloured image to zoom in.


Mark used Bradex on his old cars when he was a student and they wouldn't start.


Came across this photo yesterday - looks like they use much the same stuff in Oz.

Sunday 26 May 2013

Polishing time

As usual, click on any hand-drawn and crayon-coloured image to zoom in.


Luigi's bike is embarrassingly shiny compared to mine. I can't complain, seeing as I put next to no effort into cleaning mine, but I used a bit of bog roll and polish today on the primary chain case.


Monday 20 May 2013

Luigi's bike

As usual, click any image to zoom in.

Mark (Luigi), crazy eBayer that he is, has managed to procure some chrome trims for his 1959 BSA C15 from seller brad27110. Great communication and even better packaging - his wife is a star!

The tank is away at the moment with Tim Miller in Altrincham being relined but as soon as it's back we'll fit the trims up.

In the meantime, I Mario, have had a go at repairing his speedo. One of the "wings" inside the casing had come loose from its weld point so I've bodged it up (technical term) with a resistor leg. What are Dads for?!

Unlike his other, newer speedo there is no brass adjustment screw so it looks like we will have to calibrate this one by bending the "wings" until the needle reads accurately.


Sunday 12 May 2013

Bike sorted

Yesterday Mark suggested putting the original, shorter spring cups back in to increase the pressure on the clutch plates. I wasn't too keen because the experts I'd spoken to in the past seem to think that the shorter cups were the cause of the clutch lever being so heavy - see the earlier post on this matter.

However, Roger Taylor from RTS Racing called me back yesterday and said he had seen C15's with both longer and shorter cups in. I said that I had read on various forums that people claim that "all British bikes' clutches slipped when they were new or rebored" but to be honest, nobody would ever have bought a bike if they slipped like mine was yesterday 'cos you can't get the damn thing to start - and without bragging, I'm good at kickstarting difficult bikes.

Roger also pointed out that the same clutch is used in the B40 which is much more powerful than my bike, so Mark came round today to put the old cups back in. I say "give me a hand", but from my stool I watched him:

  1. drain the oil from the primary chaincase;
  2. remove the footpeg, remembering that it is a left-hand thread!
  3. remove the primary cover;
At that point, he kicked the bike over and we could see that while the chain was turning, the clutch wasn't. As Roger said, there's a good chance that with the longer cups in the clutch was maybe only gripping on the first plate.
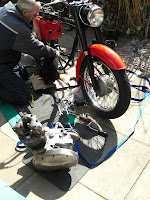
I then watched him:
  1. remove the four screws, springs, longer cups and pressure plate;
  2. put the shorter cups in;
  3. replace springs, screws and pressure plate;
  4. adjust the screws so that the pressure plate was spinning evenly;
  5. kickstart it over first time without the clutch slipping - huzzah!
Interestingly, the clutch lever is still lovely and light...

All that was left was for him to put it all back together and put my tools away while I put the kettle on.

Saturday 11 May 2013

Clutch slipping when trying to kickstart

My recently rebored C15 with new clutch plates is still being a complete pain to start from cold.

You get it to the point of compression on the kickstart, take it just past, then go for it and on one kick out of eight it will turn over but the rest of the time the kickstart lever goes straight to the bottom without any sensation of it turning the engine over.

Mark came round today and offered to help push start it. He ran up the road once and nearly got it going so I offered to take over the handlebars duty so that he could concentrate on pushing.

"That's it Mark, head down, keep pushing, we're nearly there!", I shouted encouragingly.

"Blimey, Dad, this bike is a pig to push and sounds like the engine is turning over too!", he replied between gasps.

"Er, yes, son - it'll help - keep pushing!"

"Aargh, my lungs, my legs, come on - start you pig!", he shouted, on the verge of losing his rag.

And then it fired up! Went round the block on it a couple of times to warm it up and then tried kickstarting it a few times. It had improved to maybe one kick in four that was gripping, so I'm not sure if it that the engine had warmed up, reducing resistance which was allowing the clutch to grip or whether it was because the engine was lubricated by running it in gear. I'll take the primary chain-case off tomorrow and tighten up the clutch springs a turn to see if that helps.

I only told him after we'd put the bike away and had a brew that I'd been sitting side-saddle on the bike while he was pushing it. It'll do him good.


Wednesday 8 May 2013

Mario's cup arrived today!

As usual, click any image to zoom in.

Mark spotted this mug on ebay the other night and 'Er Indoors has treated me to one. Cheers!


Monday 6 May 2013

More Surflex clutch plates!

As usual, click any image to zoom in.


After Mark reviewing his new clutch so highly, I decided to replace my plates too.

The gear changes seem better, and although it was only a short ride from Mark's house back to mine, the gear changes didn't seem to be stiff when the engine was hot.


We'll see how it performs Thursday night when we do our ride-out to The Antrobus Arms for the BSA Club meetup.

We also drilled the rear light housing and fitted the rear indicators. We just need to get some bullet connectors to finish up the wiring and add the flasher unit.


Saturday 4 May 2013

New clutch plates in Mark's bike

As usual, click any image to zoom in.


Mark's clutch lever has been always been a bit heavy and noisy even after oiling it so he went to BSA Lightning Spares and splashed out this morning on four Surflex clutch plates, four new springs and four new clutch cups.

The photo on the right shows the old plates which didn't look too bad. The new Surflex ones are brown rather than black.

The cups that were already in were about 4mm too short - looked like they were out of a Bantam, maybe. All very reminiscent of the problem I had on my C15, documented here.

The slots in the blurred photo on the left looked like a set of gums with no teeth in from where the tangs on the plates had worn them away so we filed those smooth to allow the plates to separate freely and reduce drag.


It's all back together and not only is the clutch lever significantly lighter but the gearbox no longer clunks when changing down into either first or second gear.

Friday 3 May 2013

Indicator kit

As usual, click any image to zoom in.


I've been feeling guilty about all the work I've been getting Mark to do on my bike. What, with him lecturing in Mathematics at degree level, taking me shopping, cutting my grass, maintaining my car, picking up my pension and looking after his family he probably has enough on his plate.


Therefore I've decided to fit the indicator kit I bought six months ago and have been leaving out on the kitchen table half-hidden under a tea towel every time he comes round for a brew.


What a pain it's been - worse than that time I dropped a dumbbell on Mark's foot, I reckon.  Didn't have a drill big enough, had to file to size, broke several small files, getting the stems to look symmetrical took absolutely ages.  Rear pair should be easier. (Famous last words, ha)

Sunday 21 April 2013

Rebuilt engine back in!


As usual, click any image to zoom in.


It was a lovely, sunny day yesterday. Mark and I started work at 11am and by 8pm all the tools were away.

It wasn't too bad a job really - removed the seat, petrol tank, rear mudguard, chainguard, chain, carb, exhaust, engine and then put it all back together.


Once the new engine was in we filled up the oil tank and gearbox and Mark ran the bike up and down the road with the spark plug out and in gear to get the oil round the engine until we could see the oil return pumping oil.

The bike fired up first kick, which was nice!


We had a bit of trouble starting the bike a while later because the clutch needed adjusting (adjustment bolt was too tight).

I was sitting on the bike ready to ride home when it cut out and we couldn't get it started again.


I left it at Mark's overnight and we had another go this morning, adjusting the timing, and were fast running out of ideas when Mark suggested changing the spark plug. At that point he noticed that the rebuilt engine had a Champion N4C plug and not the recommended N5C. It started first time with the N5C plug in...

Sunday 14 April 2013

Air Filter - Part Deux

As usual, click any image to zoom in.

2013-04-14 18.33.38

The first attempt at a replacement air filter (see the blog entry here) has worked fine but Mark noticed that the cloth part of the filter hasn’t survived too well as you can see in the photo on the left


2013-04-14 18.33.31While we were out for a ride today, Mark picked up a set of “Splatter screens” from B&M for £1.29 and has made up a replacement inner part of the filter by cutting out two circular elements and mounting them at approximately 45ยบ to each other to form a diagonal mesh.


He has been very careful with big, heavy scissors and managed to cut out both the circles from the larger splatter screen. There is still room for a third circle from the larger screen so not that I’m tight or anything but I’ll be able to make a replacement for mine from the same set. Cushty.


2013-04-14 18.48.56

  2013-04-14 19.11.43